Pada hari ini, kumpulan 8 telah mengajar kami apa yang selection tool boleh dilakukan dalam Photoshop.
Sebelum itu kita recap balik fungsi-fungsi selection tool:
lihat gambar-gambar dibawah:
Big_Blue_Sky.jpg
wooden-floor.jpg
akan digabung menjadi gambar seperti dibawah:
Bagaimana caranya?
Jom..saya akan tunjukkan beberapa step bagaimana menghasilkan gambar seperti di atas dengan menggunakan Adobe Photoshop:
1. buka Adobe Photoshop > File > New. ikut seperti format yang telah ditetapkan seperti dibawah. terpulang pada anda sebenarnya..tapi dalam ne saya ingin gambar saya berfomat 800x600pixel.
2. Pergi File > Open > pilih gambar Big_Blue_Sky.jpg > Open.
3. Pegi pada selection tool: Rectangular Marquee Tool (jika tool lain yang muncul, klik kanan pada mouse anda untuk dapatkan paparan seperti dibawah):
4. selepas pilih tool diatas, klik pada gambar tersebut, anda akan nampak bintik-bintik seperti gambar dibawah menandakan itu adalah kawasan gambar yang telah dipilih:
5. klik Move tool (atas Rectangular Marquee Tool) dan anda akan lihat perubahan pada gambar yang kita tandakan tadi, selepas itu klik pada gambar tersebut dan drag pada New File yang kita buat tadi. (Ctrl+C pada gambar, dan Ctrl+V pada New File pun boleh). hasilnya:
6. ini menunjukkan saiz gambar awan ne sangatlah besar, so kita kena adjust supaya fit dengan saiz New File ni.caranya dengan tekan Ctrl dan - simbol serentak untuk zoom out.kalau nak zoom in, tekan simbol =. adjust gambar awan mengikut kehendak anda. seperti paparan dibawah:
selepas adjust seperti ini:
7. selepas selesai adjust, anda harus klik pada tanda right. anda boleh resize balik gambar anda tiada masalah. save sebagai selection tool dalam format .psd (selection tool.psd)
8. masukkan pula gambar lain, Pergi File > Open > pilih gambar wooden-floor.jpg > Open.
9. Setelah file wooden-floor.jpg dibuka, Ctrl A pada gambar tersebut dan drag pada file selection tool tadi. sama seperti langkah 5.
10. adjust size dan ikut kesesuaian seperti yang anda inginkan.
tapi saya ingin menampakkan image yang lebih realistik,seperti gambar dibawah..bagaimana?
11. pergi pada Edit > Transform > Perspective (seolah-olah menampakkan efek lantai tu lagi real)
12. Ulang langkah yang sama untuk memasukkan gambar yang lain pula.
Cuba bereksperimen denganuntuk
mendapatkan pelbagai gambar yang kreatif.
Selamat mencuba!!
Nashasha juga ada menunjukkan bagaimana menggabungkan gambar seperti dibawah:
daripada gambar2 beikut:
dan efek bayang2 seperti gambar dibawah:
dan asalnya:
Boleh dikatakan advance jugak kalau nak buat efek seperti diatas..
Pada minggu ini, pembentangan oleh kump.5: Studio Photography, dan mempunyai 3 subtopik iaitu:
Equipments and technique
Shooting Still-life
Portrait and Living
Di akhir kelas, Dr Shah memberi hadiah kepada kami...jeng..jeng..jeng....assignment yang ke 2.. iaitu membuat Shooting still-life studio sendiri. Tips to Get Started with Still Life Photography boleh lihat di sini.
Apa maksud shooting still-life ne?
Still life subject is an inanimate object but other subjects are loosely termed as still life as well. These include flowers, food, etc. They are life forms but they don’t move. Because the subjects are smaller, lighting coverage is less and alternatively less power is needed. Still life setups can be lit with just daylight from a large window and/or the use of one or two flash guns with the aid of a few large white cards to utilize as reflectors.
Secara bayangannya, shooting still-life sebenarnya adalah seperti gambar diambil dalam studio.
Cuma gambar yang diambil ne bukan manusia tetapi benda yang saiznya lebih kecil. Jadi studio tu akan kecil dan comella..
sr: teganbambrickk.wordpress.com
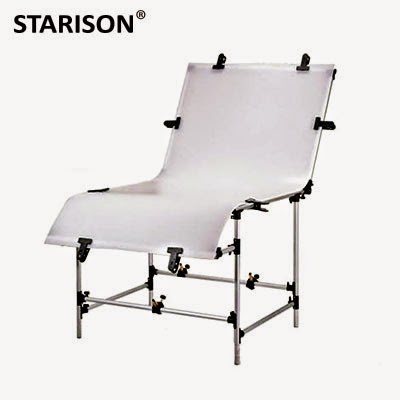
Antara peralatan khas yang boleh digunakan adalah:
sr: www.aliexpress.com
Tetapi kalau dah tak mampu nak beli benda atas ne, bolehlah DIY mengikut kreativiti sendiri:
Pada minggu ini, pembentangan disambung oleh kump.3: Light & Lighting dan kump.4: Shooting Techniques &Tips.
Light & Lighting
Pencahayaan merupakan salah satu elemen yang harus ada dalam fotografi. pelbagai jenis cahaya yang boleh digunakan (klik sini) seperti cahaya semulajadi iaitu cahaya matahari dan juga cahaya buatan sendiri seperti lampu. Fotografer yang kreatif adalah apabila beliau pandai memanipulasi dan menvariasi penggunaan cahaya ketika mengambil sesuatu gambar supaya hasil gambar tersebut kelihatan cantik dan menakjubkan. ok xnak cakap banyak.. jom tengok video youtube kat bawah:
Natural and Available Light
Example: Sunlight
ARTIFICIAL LIGHT
Example: Flash light
Example: Studio Lighting
Bonus!!
Basic Lighting Techniques
p/s: mesti stresskan asyik letak video je budak ne..sebab tengok video lagi best dari membaca....hehehe
apa yang saya faham, ia adalah teknik susunan yang memuatkan pelbagai elemen seni dalam sesuatu gambar agar hasil gambar tersebut sangat tinggi dan lebih menarik selain dapat menyeimbangkan objek yang terdapat di dalamnya.
Terdapat banyak asas-asas bagi komposisi gambar ini, antaranya ialah rule of third, keseimbangan, garisan, simetri dan sbgnya. boleh rujuk di sini
Elemen-elemen yang penting dalam komposisi sesebuah gambar antaranya adalah:
Line – lines and edges that the eye follows within the scene
sr: www.pinterest.com
sr: imgarcade.com
Colour – the variety of colours and individual hues (and intensities/brightness of each).
sr: imgarcade.com
sr: www.slideshowblog.com
Shape – a two dimensional area, marked out by edges, which exhibits similar textures/colours and may be geometric or defined by organic or natural processes.
sr: www.photographyicon.com
sr: capoinfocusap.blogspot.com
Texture – the surface detail of ‘shapes’ or ‘forms’ that persuade the eye they would have the feel of the real thing if touched.
sr: www.naturephotographers.net
Depth – the viewers perception of distance between ‘foreground’ and the ‘background’ in the picture.
Pelbagai teknik mengambil gambar boleh anda buat supaya gambar yang diambil memberi impak yang berbeza dari kebiasaannya.
Salah satu unsur yang membangun sebuah komposisi foto adalah sudut pengambilan objek. Berikut jenis sudut pengambilan foto atau sering disebut kamera angle yang boleh kita guna ketika memotret:
High Angle: berbeza dengan bird eye, kita sama-sama berada pada posisi lebih tinggi dari objek foto. Misalnya memotret sawah dari atas bukit.
sr: giveawaytuesdays.wonderhowto.com
Bird Eye : posisi objek yang difoto di bawah lebih rendah dari posisi kita, biasa untuk memotret manusia
sr: www.flickr.com
Eye Level : Sudut pengambilan gambar yang dimana objek dan kamera sejajar / sama seperti mata memandang.
sr: digital-photography-school.com
Low Angle : Sudut pemotretan dimana objek lebih tinggi dari posisi kamera. Misalnya potret gedung bertingkat.
sr: cheneyasmedia-shaianegallardo.blogspot.com
Frog Eye : Sudut penglihatan sebatas mata katak. Pada posisi ini kamera berada di dasar bawah, hampir sejajar dengan tanah dan tidak dihadapkan ke atas. Biasanya memotret seperti ini dilakukan dalam peperangan dan untuk memotret flora dan fauna.
Pada minggu ini (Week5), kumpulan 2 & 3 telah membentangkan tajuk masing-masing iaitu, Kum.2: Digital Photography dan Kum.3: Light and Lightning. Jadi, tak perlula saya ulas balik apa yang dibentangkan kerana kedua-dua kumpulan telah menunjukkan hasil pembentangan yang jelas dan menarik. Cuma dibawah ini, saya ingin menambah sedikit informasi mengenai Digital Photography hasil dari pertanyaan saya kepada Prof Dr Gogel :P . Light and Lightning akan diulas pada blog akan datang ye..
Bagaimana mengawal DSLR anda?
Sebelum mengambil gambar-gambar yang cantik tertarik menarik menggunakan dslr, anda haruslah tahu fungsi-fungsi butang ada pada dslr tersebut. Jangan main tekan je..berikut merupakan fungsi-fungsi yang berguna untuk digunakan ketika mengambil gambar (untuk Canonla..Nikon pun lebih kurang sama fungsinya, cuma kedudukan butang kadangkala berbeza ) :
1. Shutter Button
The most important button of all! Almost no lag at all between pressing on it and capturing a photograph. To auto focus or see the settings, you can also press it half-way.
2. Focus Assist Beam
Helps with illuminating the subject in low light situations.
3. Lens Mount Indicator
Most DSLR cameras accept two types of lenses (EF-S and EF at Canon, DX and FX at Nikon). In our image, the red dot marks the spot for your EF lines, while the white one is where you would start putting on your EF-S lens.
4. Flash
The built-in flash that always jumps out in Automatic shooting mode.
5. Flash Button
In manual modes, the use of a flash is up to you. Press this button to make it jump out!
6. Lens Removal
The button you need to hold in order to take off a lens
7. Lens Contacts
This is how your lens communicates with the camera; aperture, auto focus and lots of other settings.
8. Mirror
There’s a reason why the mirror is hidden inside, it’s crucial for transferring the light up into the pentaprism. Try not to get any dust inside of your body when swapping between lenses.
1. Menu
Why make it complicated; it shows you the main menu of your camera. Functions, controls, flash control; you can change it all in there.
2. Info
Displays information depending on what you are looking at in your camera (information of a photograph and so on).
3. Dioptre Adjustment
A great adjustment for those of you who have problems with vision.
4. Movie/Live View Mode
Switch between the Live View and Movie mode with one single click. Use the start/stop button to record movies.
5. AF-ON
Whilst holding the button, your camera will not re-auto focus or adjust the settings again; it will use whatever you had prior to holding it.
6. Zoom in/Exposure Lock
Allows you to keep the exposure metering you just did, and to zoom in on any photograph.
7. Zoom out/Focus Point
If you want to manually select your focus point (or groups) then you would use this button. Oh, it also zooms out your shots.
8. Memory Card Slot
Either SDHC or CF. Some more expensive DSLR cameras also offer 2 slots!
9. Set/Main Wheel
The Set button is for accepting any changes, while the main wheel is for navigating in the menu, selecting different values etc.
10. Trash Icon
Deletes the image you are currently previewing (for deleting multiple shots at once you have to use a function in the menu)
11. Playback
What’s the point of a digital camera if you can’t see what you just photographed? Use the playback button (and zoom in/out to see multiple shots).
12. LCD Screen
A few years ago, a screen was just a screen. Now we have different resolutions, different sizes and even articulating ones (move them around). Most common features here are a 3.0″ LCD screen with over 920,00 dots, more than great for many of us.
1. Mode Dial
Switch between different modes. Make sure to read my camera shooting modes article!
2. Top Buttons
Commonly found on more professional models, these buttons make our lives much easier! Change the white balance, select the ISO speed and so on. Each has two different values that you can control with two different dials on the body.
3. Main Dial
Used for changing the shutter speed, aperture and all other values
4. Top LCD Screen
Another exclusive feature for semi-pro and higher models, a top LCD screen will allow you to see your settings immediately. Cheaper cameras tend to do that on the LCD screen, or only in the viewfinder.
5. Hot-shoe
Attach your flash, wireless triggers and other devices here!
6. Power switch
Simple switch to turn on/off the camera.
1. Viewfinder
One of the major differences between DSLRs and P&S cameras is the quality of the viewfinder. Because the light is reflected up with the help of a mirror, you’re looking at the world at the speed of light! Not to mention it’s much brighter and has lots of information about your settings inside of it.
2. Devices
Usually two slots for different types of cables or attachments. HDMI and USB are a must, while latest cameras also feature a microphone input for better audio quality!
Selalunya bagi pengguna baru dslr, automatic setting akan menjadi pilihan hati untuk digunakan. Ini kerana sesuai dengan namanya 'automatic', segala ISO, aperture dan exposure telah disetting sendiri mengikut keadaan gambar itu diambil (tapi kalau dah beli kamera mahal-mahal, takkanla nak guna setting automatic jekan..baik beli compact camera je..)
sr: www.lilblueboo.com
sr: www.canon-1100d.com
Ber'eksperimen' Menggunakan Manual Setting
Manual setting/exposure digunakan apabila pengguna ingin mengawal sendiri shutter speed, aperture, warna, flash n sbgnya ketika mengambil gambar. Jadi, gambar menjadi lebih menarik dan kreatif. Boleh klik disini untuk mengetahui tips menggunakan manual setting dan klik ini untuk mengetahui asas-asas teknik fotografi.
Hari ini En Puat menunjukkan kami antara alatan-alatan yang digunakan dalam studio fotografi:
Encik Puat menunjukkan kamera (x ingat apa namanya)
kamera ini digunakan khas untuk mengambil gambar dalam studio (modelling). antara ciri-cirinya adalah:
16 megapixel
kamera depan menggunakan sistem analog dan belakangnya sistem digital
tiada memory card tetapi menggunakan image bank
harga bagi sistem digital = RM79k, sistem analog = RM40k (tidak pasti sama ada harga pasaran dahulu atau sekarang)
Pengukur Cahaya/Flash Meter / Light meter
sr: www.frankdoorhof.com
Alat ini mengukur cahaya yang dikeluarkan oleh lampu studio dan digunakan untuk menentukan bukaan diafragma yang seharusnya ada dikamera.
Sumber : http://isjustyogaa.blogspot.com/2012/08/mengenal-peralatan-dan-perlengkapan.html#ixzz3GBQWiKKp
An external light meter (most often simply referred to as a light meter) is a separate gizmo for your dSLR that measures the amount of light in a scene. That's all it does. It doesn't take pictures. More expensive light meters can measure reflected and incident light. Some light meters only measure incident light. While not strictly necessary, a light meter can be a valuable addition to your kit.
Look up your light meter’s manual for specific instructions. In the meantime, here is a general sense of how they work.
Turn on your light meter and set it up.
Set the measuring mode, if necessary (some measure flash as well as ambient light). Extend the dome if you’re using the meter incident mode.
If you're using the meter in spot mode, sight what you want to meter through the meter's eyepiece before you press the measure button, and you can keep the light dome retracted.
Choose a shooting mode.
Select the shooting mode that lets you enter the setting you want fixed. For example, if you want to set the meter to use f/8 as the aperture, set the meter to Aperture priority mode. This has nothing to do with your camera. You won't be using this mode anyway, as Aperture and Shutter priority modes on your camera are autoexposure modes.
Enter the value.
Enter the appropriate fixed value, such as the aperture or shutter speed, that you want to use.
Enter an ISO speed.
Hold the meter so that nothing is in its way.
If you're shooting a landscape, hold the light meter out or up to keep your body from blocking the light. If you're shooting a portrait, go over to your subject and hold the meter with the light dome pointing towards the camera.
If necessary, press the measure button.
This meters the scene.
Read the measured exposure setting value.
This isn’t the setting you entered in Step 3. It will be the floating exposure setting that you haven’t accounted for.
Switch to Manual mode on your camera and enter the values indicated by the light meter.
Tips dari En Puat: set ISO kamera mesti sama dengan light meter. ISO dalam bilik: 400. (Flash hala ke atas bagi mengelakkan ada shadow)
Stand + Softbox
Biasanya setiap pembelian lampu flash studio dillengkapi dengan reflector dan ia menghasilkan cahaya secara terus. Jadi, untuk mengelakkan cahaya terus pergi pada subjek, softbox akan diletakkan untuk menghalang.


 untuk
untuk 
.jpg)
.jpg)


.png)


.jpg)


.jpg)


